Rear Axle and Suspension
Rear Suspension General
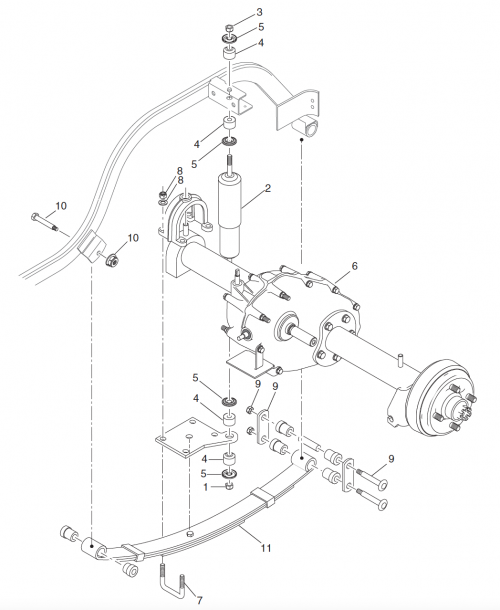
The rear suspension assemblies contain rear axle, springs and shock absorbers. Furthermore the rear axle is mounted to the rear of the engine via a ‘U’ bolted casting.
Shock Absorber Removal
- Lift the back of the vehicle safely in a controlled manner,
- Support the back of the vehicle some chocks or similar,
- Disconnect the lower shock absorber nut,
- Compressing the shock absorber, take off the upper shock absorber nut,
- Take off the shock absorber.
Shock Absorber Installation
- Compressing the shock absorber, torque the upper shock absorber nut until the bushings expand to the diameter of the washer,
- Refit the shock absorber,
- Torque the lower shock absorber nut until the bushings expand to the diameter of the washer,
- Lift the back of the vehicle off the chocks and situate in a normal position.
Rear Spring Removal
- Disconnect the lower shock absorber nut,
- Situate a floor jack under the center of the rear axle and jack until enough clearance exists to place jack stands under the axle tubes,
- Remove the ‘U-bolt’ and fittings,
- Take off the rear spring shackle assembly and front spring mounting fittings,
- Take off the spring.
Rear Spring Installation
Rear spring installation is the reverse order of above. However when tightening the shock absorber nut, do so until the bushing expands to the diameter of the shock absorber washer. All front spring hardware should be torqued to 21-25ft. lbs. (28-34 Nm). All other fittings should be torqued to 18-22Ft. lbs. (24-30Nm).
REAR AXLE REMOVAL
- Lift the back of the vehicle safely in a controlled manner,
- Support the back of the vehicle some chocks or similar,
- Take off the tires,
- Take off the muffler,
- Take off the triangle bracket fastening the differential to the engine frame,
- Disconnect the ‘U’ bolts holding the axle to engine frame,
- Take off drive belt and driven clutch,
- Disconnect the F/R shifter bracket nut and slacken the cable nuts,
- Take off the differential cable and bracket,
- Disconnect and take off the accelerator cable and remove the push nut attaching the cable to the governor,
- Take off the linkage rod off the governor,
- Take off all shock absorbers,
- Take off ‘U’ bolts and fittings from the springs with a 9/16” socket,
- Take off the clevis pins from the brake cables at the wheel brake levers,
- Take off brake cable,
- Remove the retaining rings from both ends of the brake cable,
- Situate a floor jack under the center of the rear axle and jack until enough clearance exists to place jack stands under the axle tubes,
- Remove ‘U’bolt and fittings from the spring,
- Remove the rear axle from the cart.
Rear Axle Installation
Rear axle installation is reverse order of above.
NEUTRAL LOCK
The neutral lock prevents the driven clutch from turning the back wheels when towing or during servicing. You can find the neutral lock at the direction selector.
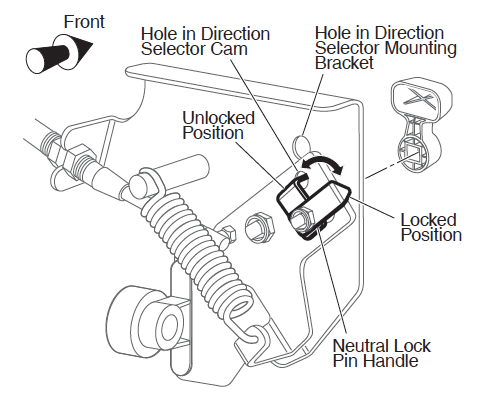
To function the neutral lock carry out the following:
- Turn the keys to OFF and place the direction selector into REVERSE,
- Remove the seat,
- Retract and turn the neutral pin handle such that the pointed part of the handle aligns with the direction selector cam,
- Position the direction selector lever between FORWARD and REVERSE,
- The pin should lock into the hole, pocking the lever into place,
- To reinstate the direction selector, retract the neutral lock pin handle out and turn until the pointed part of the handle fits into the hole of the direction selector cam.
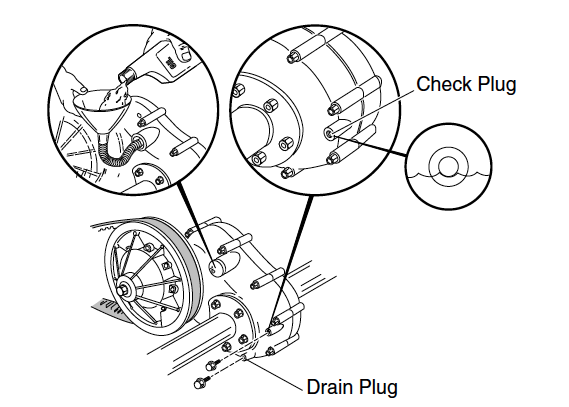
REAR AXLE
The rear axle contains a lube oil level check plug near the drivers side.
Checking the Lubricant Level
- Take out the check plug,
- Check the level, the optimum lubricant level is just below the bottom end of the threaded hole,
- Should lubricate be needed, remove the fill plug and fill with the aid of a funnel. Check level routinely when filling, total capacity is 40 fl. oz. (1.2L).
REAR AXLE DISASSEMBLY
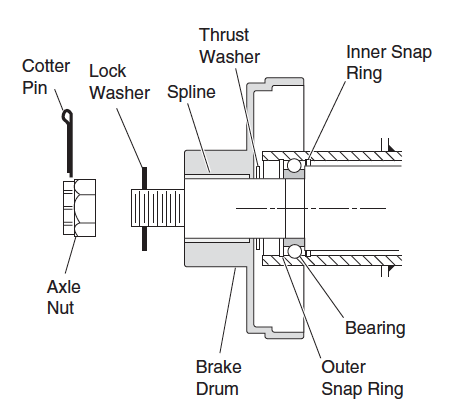
Axle Shaft Removal and Disassembly
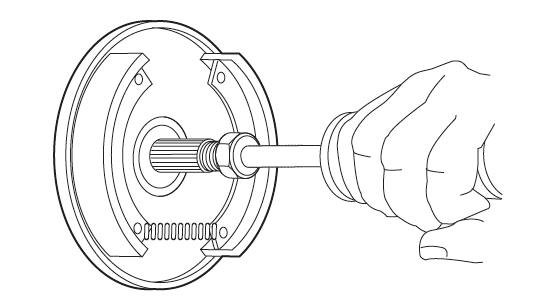
- Take off the outer snap ring from the axle tube,
- Fit a slide hammer to the axle shaft thread and take off the axle and bearing from the axle tube,
- Take off the bearing ensuring you support the bearing inner race on an arbor press bed,
- Put force to the threaded end of the axle shaft.
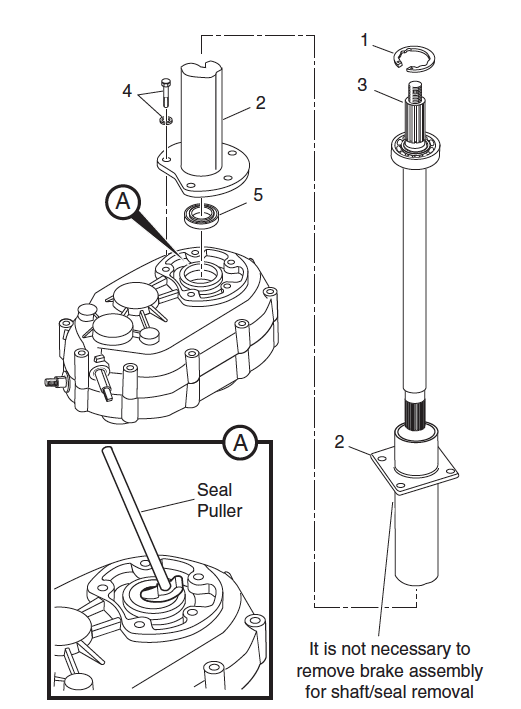
Axle Shaft Seal Removal and Replacement
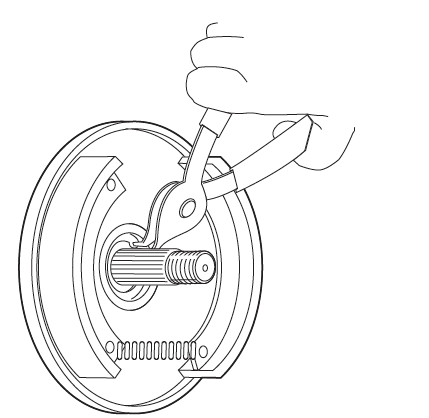
- With the aid of snap ring pliers take off the bearing retaining ring,
- Retract and remove the axle shaft and bearing from the axle tube,
- Remove all fittings with a 17mm socket, lifting the tube from the casing studs,
- Take off the axle shaft seal with the aid of a seal puller,
- Replace seal with the aid of a plastic faced hammer and torque nuts to 26-31 ft. lbs. (35-42Nm).

Axle Shaft Replacement
- Slowly and surely reinsert the axle shaft and bearing into the seal,
- Turn shaft until spline marries with differential side gears,
- Reinstate outer snap ring,
- Spray WD-40 or equivalent on the outboard spline,
- Reinstate brake hub and drum, thrust washer, nut and new cotter pin.